Beacon Villages

Under Cosdon Beacon Dartmoor Devon UK
| Beacon Villages Journal | Digital Photos |
|
It occurred to me that many of you may have got a digital camera as a Xmas present and have spent the last week or so trying it out, either on your family Xmas festivities or, if you are as lucky as us on Dartmoor, on the snow that fell over the holiday. It is also likely that you have your own computer at home or have access to one. What if some of your photos were nice enough to want to share them with us on the web or e-mail them to family or friends? Let us start with a typical problem - you want to send your photos by e-mail. When you try to do it, either by making them attachments or including them in your mail, you find that they take forever to send (particularly on 'dial-up') or, in some cases, they are rejected as 'too big'. It is easy to overcome this problem by making them 'smaller'. All you need to know is how! What is meant by size - bigger or smaller? When you bought your camera, you probably already knew that 'the more megapixels the better the quality'. A 5 Megapixel camera is better quality than a 2 Megapixel one. If you got as far as reading the instruction manual that came with the camera, you probably found out that you can have a choice of a few 'high quality' photos or more 'lower quality' ones. on the particular memory card that you have. Forgetting the technical bit, what it comes down to is size. Digital photos are made up of little blocks called pixels (each representing the colour shade and intensity of the light) - the more you use, the larger physically the picture can be before the eye notices the individual blocks. However, the more you use, the larger the data size needed to store them all. So, if you take a photo 2048 x 1536 pixels on a (normal) colour scale with 16 million variations of shade and intensity then you will need around 1Mb of storage to save it. Compare this with a 'normal' e-mail which might be say 10Kb, you can see that it would take 100 times as long to send the photo. If you had half a dozen to send .... ? Two things you can do. a) Reduce the physical size. b) Compress the reduced size. The size quoted would easily fill a full A4 sheet of paper. Very few of us need photos that big. On the other hand, most photos I use on this site (not the Photo Album) are 300 x 224 pixels - seven times smaller! Whilst they are OK for a web page, they may be too small for normal viewing. A typical 6" x 4" print comes out at about 432 x 308 pixels. Next, re-sizing often reduces the sharpness of a photo so sharpen them after re-sizing. Lastly - compression. Don't worry about the technicalities again, there are ways of representing your picture using less storage space. It does reduce the quality a bit but in most cases this is not noticeable. So, compress your photos after re-sizing them. And that's it. 1. Re-size. 2. Sharpen. 3. Compress. In that way, you can reduce the memory size of a photo from 1Mb to 16Kb, send it comfortably by e-mail and still produce a decent 6" x 4" print the other end! OK, how? With software, of course. My favourite is Paint Shop Pro. This has now reached version 9 and costs about £70 but earlier versions are available either free or 'on trial' often on computing magazine free CDs. There is another free piece of software called Irfanview, which will do this (and a lot more) for you. This again is available on mag CDs or you can download it from http://www.irfanview.com There are many photo editing programs around, you probably have one, but (like me) have not bothered to read the manual, Lastly, just a few general tips (Illustrated at the end of the article, below) Probably the best improvement you can make to your photos is to CROP them. This may include making them LEVEL as well. That is making the sea horizontal and the doorways and lampposts vertical. Even professionals do not always frame the subject and leave out the unimportant stuff. If you have taken your picture at top quality, then you can afford to cut it down to the essentials. Remove COLOUR CASTs. Indoor (without flash) and particularly snow photos often come out with an overall colour cast - blue, red, etc. Software will allow you to correct for this. Adjust BRIGHTNESS, CONTRAST, COLOUR SATURATION (and sometimes SHARPNESS). Don't just accept what comes out of your camera as the only version of your photo. If it is too dark - you can lighten it, too dull - you can brighten it, too pale - you can make it more colourful, etc. There is no such thing as a 'true' photograph. What I see when I look at the world is quite different from what a colour blind person sees and yet both are 'true'. What one camera 'sees' may be quite different from what another one 'sees', yet again, both are 'true'. Be brave and use the technology to make your photos what you want them to be. And them send them to us to show the world what you can do! |
||
 |
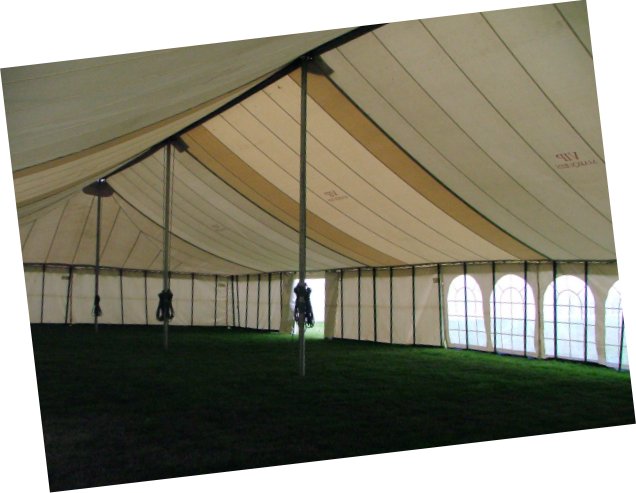
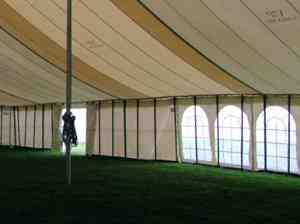
Original photo : Large size |
|
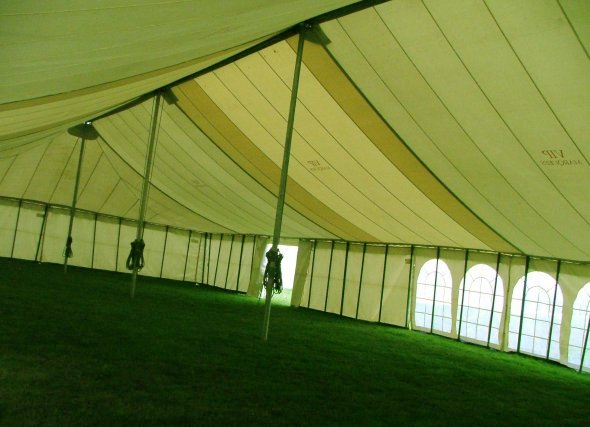
Colour cast removed |
 |
|
vertically (tent poles) straightened |
||
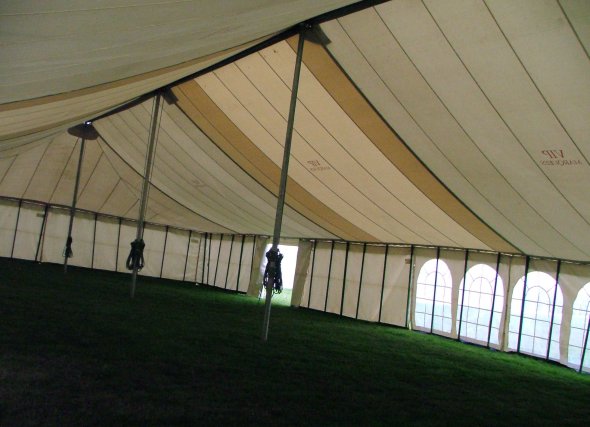
Unwanted content cropped off |
 |
|
 |
< = Re-sized sharpened = > |
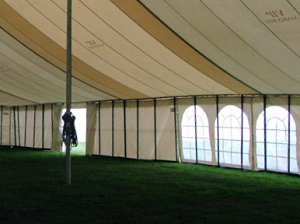 |
Condensed = > The final result : colur corrected, straightened, subject cropped, resized, sharpened and condensed. It was 47kb. It is now 6kb (eight times smaller) and will easily and quickly e-mail |
 |
|